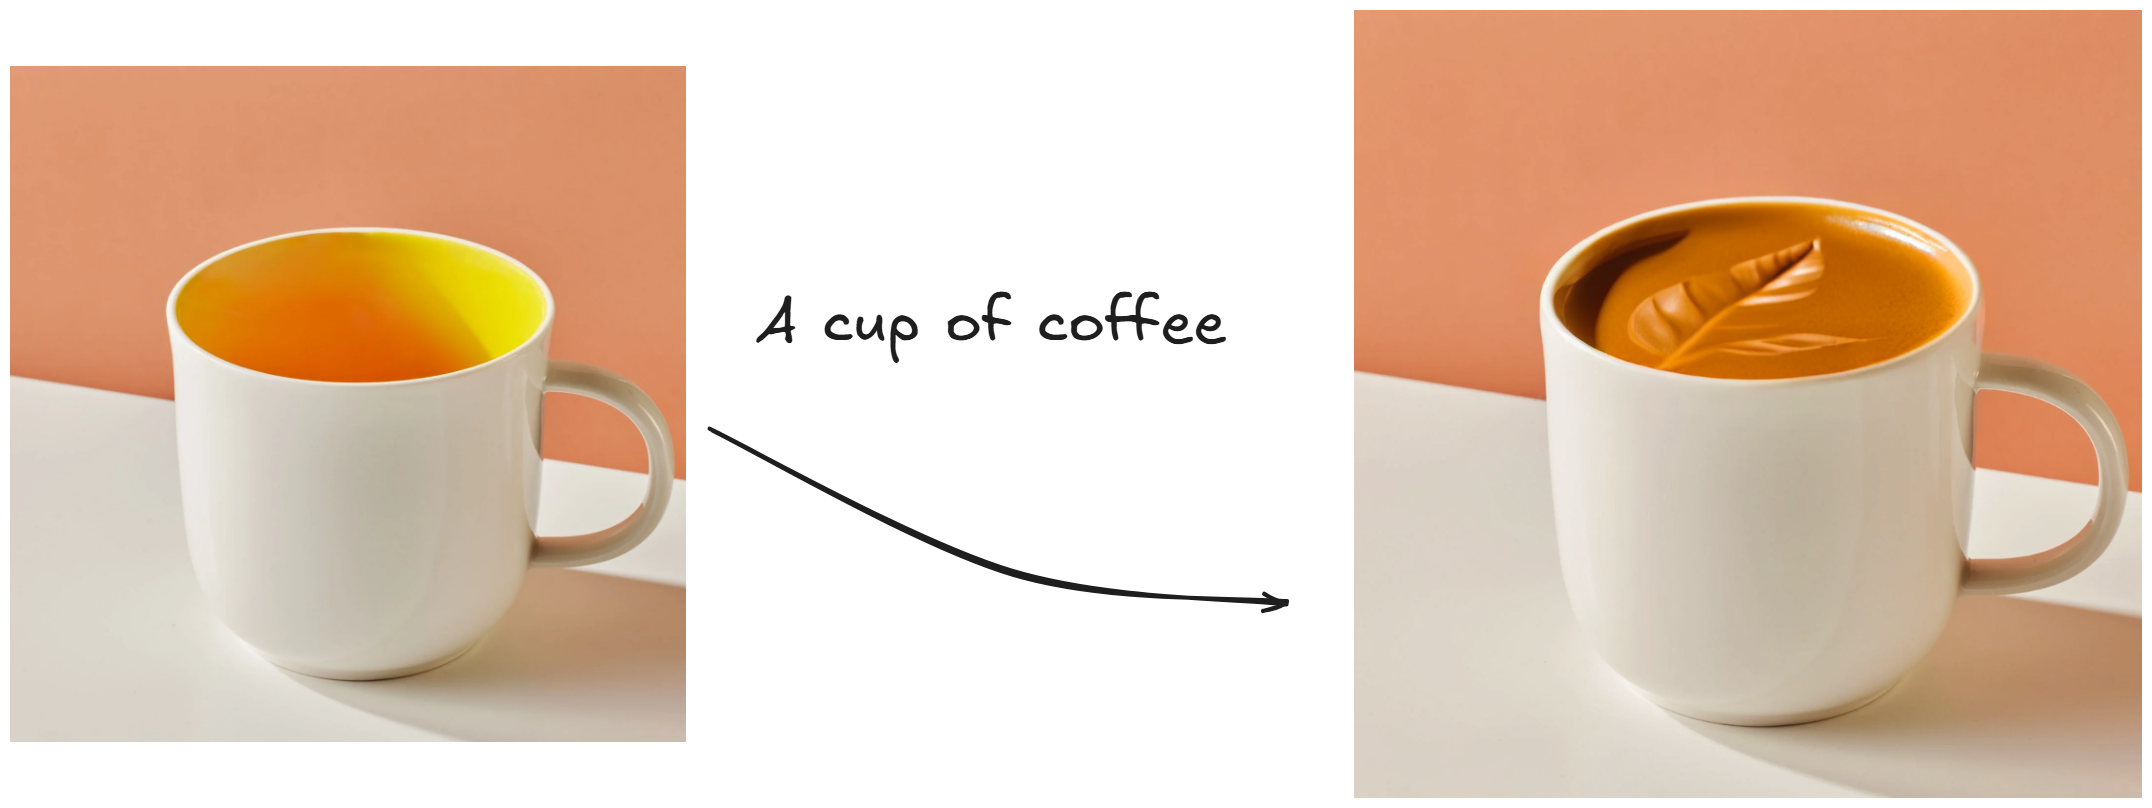
Edit Your Images Easily with Inpainting and Diffusion
Wondering how new technology supports us in image modification and editing? It turns out diffusion can help us a lot. Among these techniques, image-to-image methods like impainting are especially useful. Instead of generating a whole new image, we focus only on modifying specific parts of an existing image.
- Preparing the environment
- Installing the library
- Loading the model and performing inference in Python
- Creating an interactive UI with Gradio for a better experience
 Click to zoom
Requirements: To run this lab, we suggest having a GPU with 12GB of VRAM, or using Google Colab is preferred.
Prepare the Environment
In this tutorial, we run the diffusion model in a Python 3.9 environment using the Anaconda manager. If you are using Google Colab, you can skip this step. Below is how you can set up the environment:
1# Create a new conda environment
2conda create -n diffusion python=3.9
3conda activate diffusion
Then, we need to install Torch and Transformers. These libraries are essential for running the diffusion model.
1# Install the transformers library
2pip install transformers
Pay attention to the version of CUDA on your system. If you are using Google Colab, you don’t need to install Torch. For example, in our system, we are using CUDA 12.4 and above, so the installation will be:
1# Install torch based on your CUDA version
2pip install torch torchvision torchaudio --extra-index-url https://download.pytorch.org/whl/cu124
Next, we will install Diffusers, the module that enables inpainting.
1# Install the diffusers library
2pip install diffusers
Load the Model
If you check out Hugging Face, several models are available. Remember to select the impainting model. In this tutorial, let's use diffusers/stable-diffusion-xl-1.0-inpainting-0.1 as our starting point. The code to load a pipeline that applies this model is as follows:
1import torch
2from diffusers import AutoPipelineForInpainting
3# Load model and move it to GPU
4pipe = AutoPipelineForInpainting.from_pretrained(
5        "diffusers/stable-diffusion-xl-1.0-inpainting-0.1",
6    torch_dtype=torch.float16
7).to("cuda")
Explanation of the code above:
- We import torch and the AutoPipelineForInpainting from the Diffusers library.
- The
from_pretrainedmethod loads the specified model, and we set it to run on the GPU usingtorch.float16for better performance.
Load Image and Mask
The idea of impainting is to modify parts of an image.
Images are the visuals we want to edit, while masks specify the areas we want to change.
We will load an available image and mask for testing as shown below:
1# Load an image to inpaint
2url = "https://huggingface.co/datasets/huggingface/documentation-images/resolve/main/diffusers/inpaint.png"
3response = requests.get(url)
4image = Image.open(BytesIO(response.content)).convert("RGB")
5# Load the mask image
6mask_url = "https://huggingface.co/datasets/huggingface/documentation-images/resolve/main/diffusers/inpaint_mask.png"
7mask_response = requests.get(mask_url)
8mask_image = Image.open(BytesIO(mask_response.content)).convert("RGB")
9# Resize images if necessary
10image = image.resize((1024, 1024))
11mask_image = mask_image.resize((1024, 1024))
Explanation of the code:
- We load the image and the mask using URLs.
- The images are converted to RGB format and resized to 1024x1024 pixels. Let’s visualize the images we loaded from the above URLs:
1# Visualize both images in the same chart using matplotlib
2import matplotlib.pyplot as plt
3fig, ax = plt.subplots(1, 2, figsize=(10, 5))
4ax[0].imshow(image)
5ax[0].set_title("Image")
6ax[0].axis("off")
7ax[1].imshow(mask_image)
8ax[1].set_title("Mask")
9ax[1].axis("off")
10plt.show()
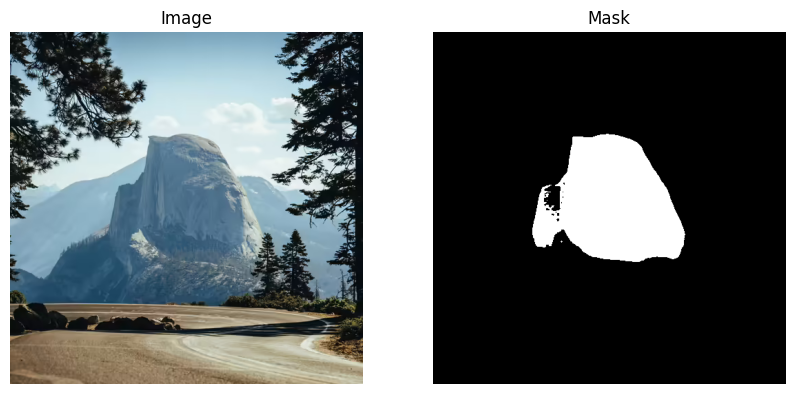
As you can see, the original image shows a picture of a road and a mountain in the center. The mask covers the part of the mountain. Our aim is to use impainting to change this mountain using a prompt.
Set Up the Prompt
A prompt is a textual description of what we want to generate in the masked area.
1generator = torch.Generator("cuda").manual_seed(92)
2prompt = 'an elven castle, in the mountain mist'
We use a generator to ensure the output is consistent whenever we use the same prompt. Next, we input the prompt, image, and mask into the pipeline:
1# Generate the inpainted image
2impainted_image = pipe(prompt=prompt, image=image, mask_image=mask_image, generator=generator).images[0]
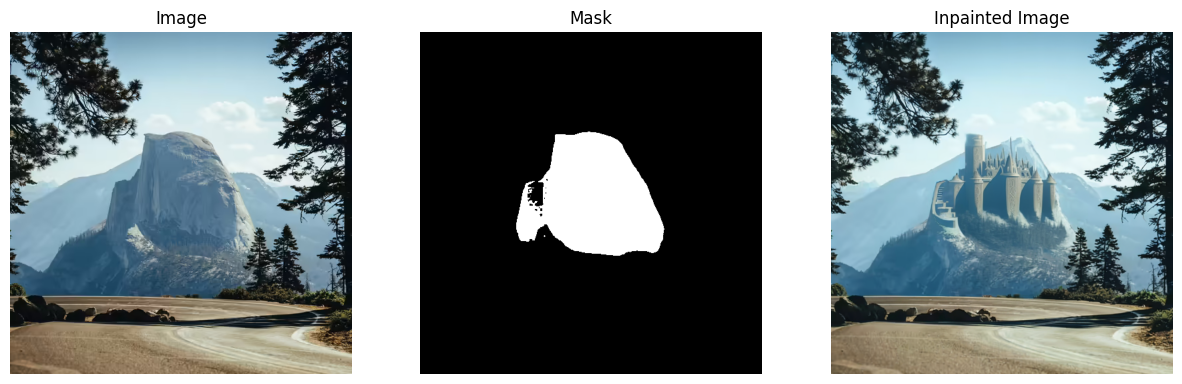
It may take some time to process, depending on the speed of your GPU. Let’s visualize the results of inpainting:
1# Use matplotlib to visualize the image, mask, and inpainted image
2fig, ax = plt.subplots(1, 3, figsize=(15, 5))
3ax[0].imshow(image)
4ax[0].set_title("Image")
5ax[0].axis("off")
6ax[1].imshow(mask_image)
7ax[1].set_title("Mask")
8ax[1].axis("off")
9ax[2].imshow(impainted_image)
10ax[2].set_title("Inpainted Image")
11ax[2].axis("off")
12plt.show()
Change the Parameters
We can adjust the parameters in the pipeline, such as guidance scale, number of inference steps, and strength.
1impainted_image = pipe(
2        prompt=prompt,
3    image=image,
4    mask_image=mask_image,
5    guidance_scale=8.0,
6    num_inference_steps=20,  # Steps between 15 and 30 work well for us
7    strength=0.99,  # Ensure `strength` is below 1.0
8).images[0]
Explanation of each parameter:
- guidance_scale: This controls how closely the generated image should match the prompt. Higher values make the image adhere more closely to the prompt.
- num_inference_steps: This determines how many steps the model takes to generate the image. More steps can lead to better results.
- strength: This adjusts how much of the original image is preserved. A value below 1.0 means some original features are retained.
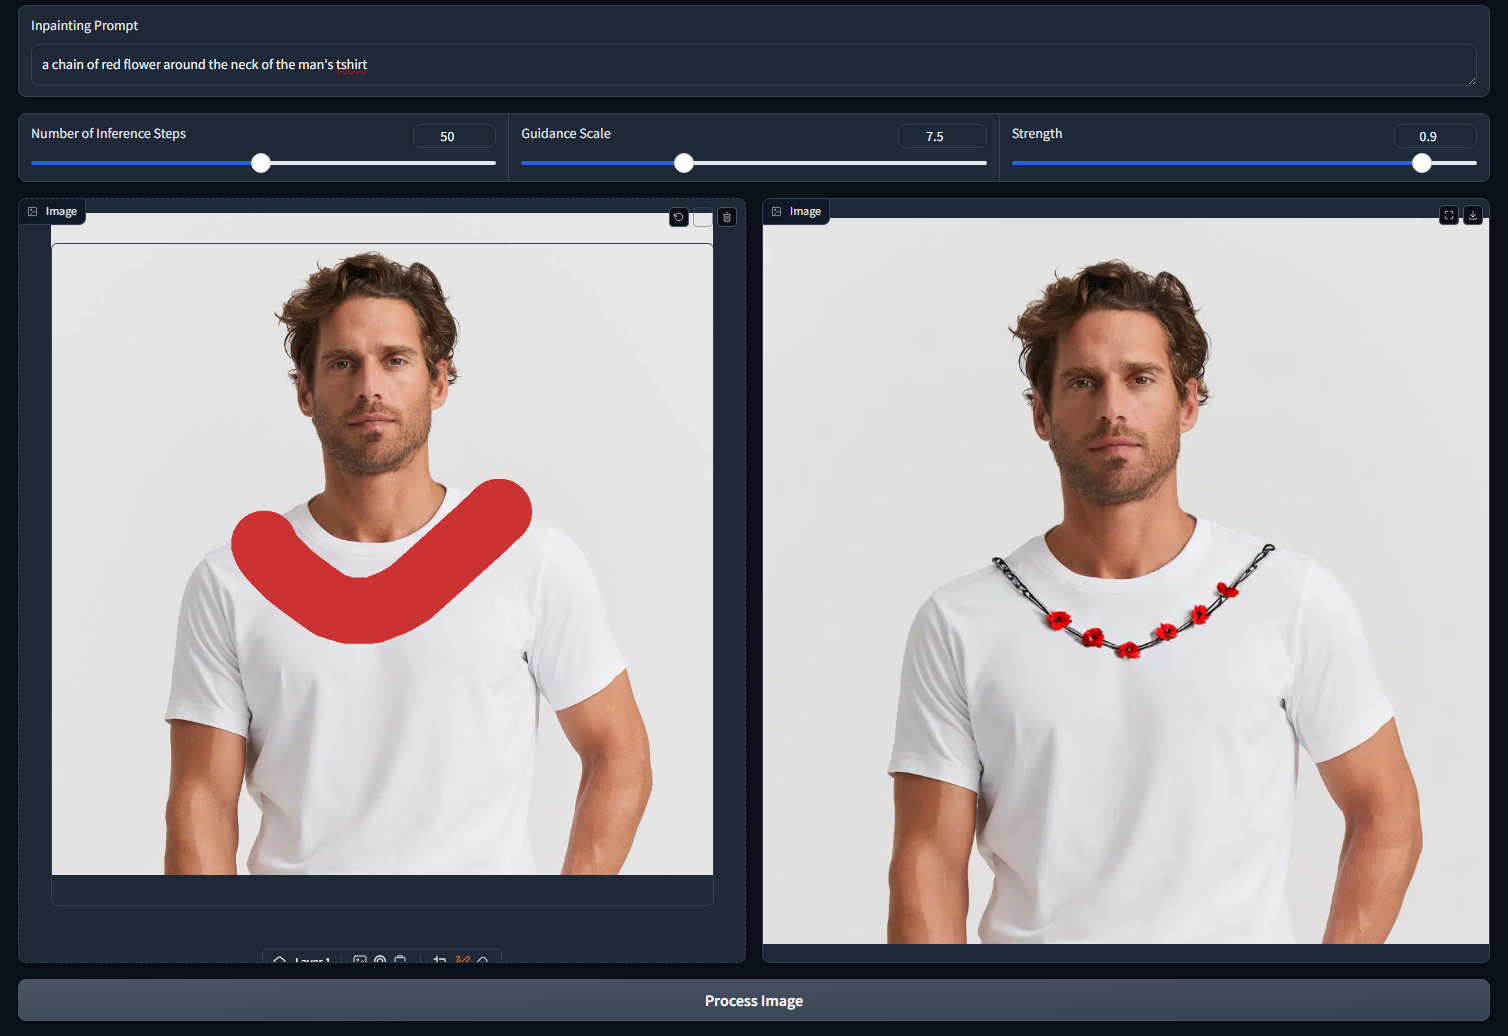
Interactive UI with Gradio
We can use Gradio to create an AI tool that allows users to draw a mask and apply inpainting.
1# Install Gradio
2pip install gradio
First, we create a function to receive the image, prompt, mask, and parameters:
1# Dummy inpainting function with hyperparameters
2def impaint(img, prompt, num_steps, guidance_scale, strength):
3    # Extract alpha channel to create a mask for inpainting
4    background = img["background"][:, :, :3]  # Discard the alpha channel, keep RGB
5
6    # Extract alpha channel to create a mask for inpainting
7    alpha_channel = img["layers"][0][:, :, 3]
8    mask = np.where(alpha_channel == 0, 0, 255).astype(np.uint8)
9
10    background = Image.fromarray(background)
11    mask = Image.fromarray(mask)
12
13    # Apply inpainting with the given prompt and hyperparameters
14    impainted_image = pipe(prompt=prompt, image=background,
15                            mask_image=mask,
16                            num_steps=num_steps, guidance_scale=guidance_scale, strength=strength
17                            ).images[0]
18
19    return impainted_image
- The impaint function takes in an image, prompt, and parameters.
- It extracts the background and the alpha channel to create a mask.
- The inpainting is performed with the given parameters, and the inpainted image is returned. Next, we set up the Gradio interface:
1with gr.Blocks() as demo:
2
3    with gr.Row():
4        # Textbox to enter the inpainting prompt
5        prompt_input = gr.Textbox(label="Inpainting Prompt", placeholder="Enter text prompt for inpainting")
6
7    with gr.Row():
8        # Numeric inputs for editing hyperparameters
9        num_steps = gr.Slider(minimum=1, maximum=100, value=50, step=1, label="Number of Inference Steps")
10        guidance_scale = gr.Slider(minimum=1.0, maximum=20.0, value=7.5, step=0.1, label="Guidance Scale")
11        strength = gr.Slider(minimum=0.0, maximum=1.0, value=0.5, step=0.1, label="Strength")
12
13    with gr.Row():
14        img = gr.ImageEditor(
15                crop_size="1:1",
16            height="30vw"
17        )
18        im_preview = gr.Image(height="30vw")
19
20    # Automatically process the uploaded image and show it immediately
21    btn = gr.Button("Process Image")
22    btn.click(impaint, [img, prompt_input, num_steps, guidance_scale, strength], [im_preview])
23    ```
24- We set up the **Gradio** interface with input fields for the prompt and hyperparameters.
25- The **ImageEditor** allows users to draw the mask directly on the image.
26- When the **Process Image** button is clicked, the **impaint** function processes the inputs and displays the inpainted image.
27Finally, we run the code:
28```python
29demo.launch()
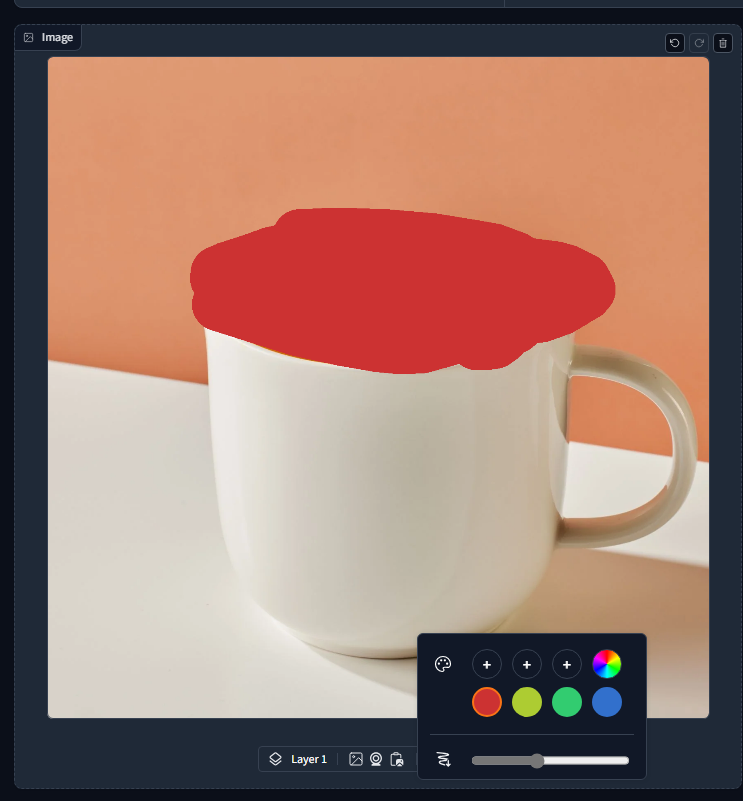
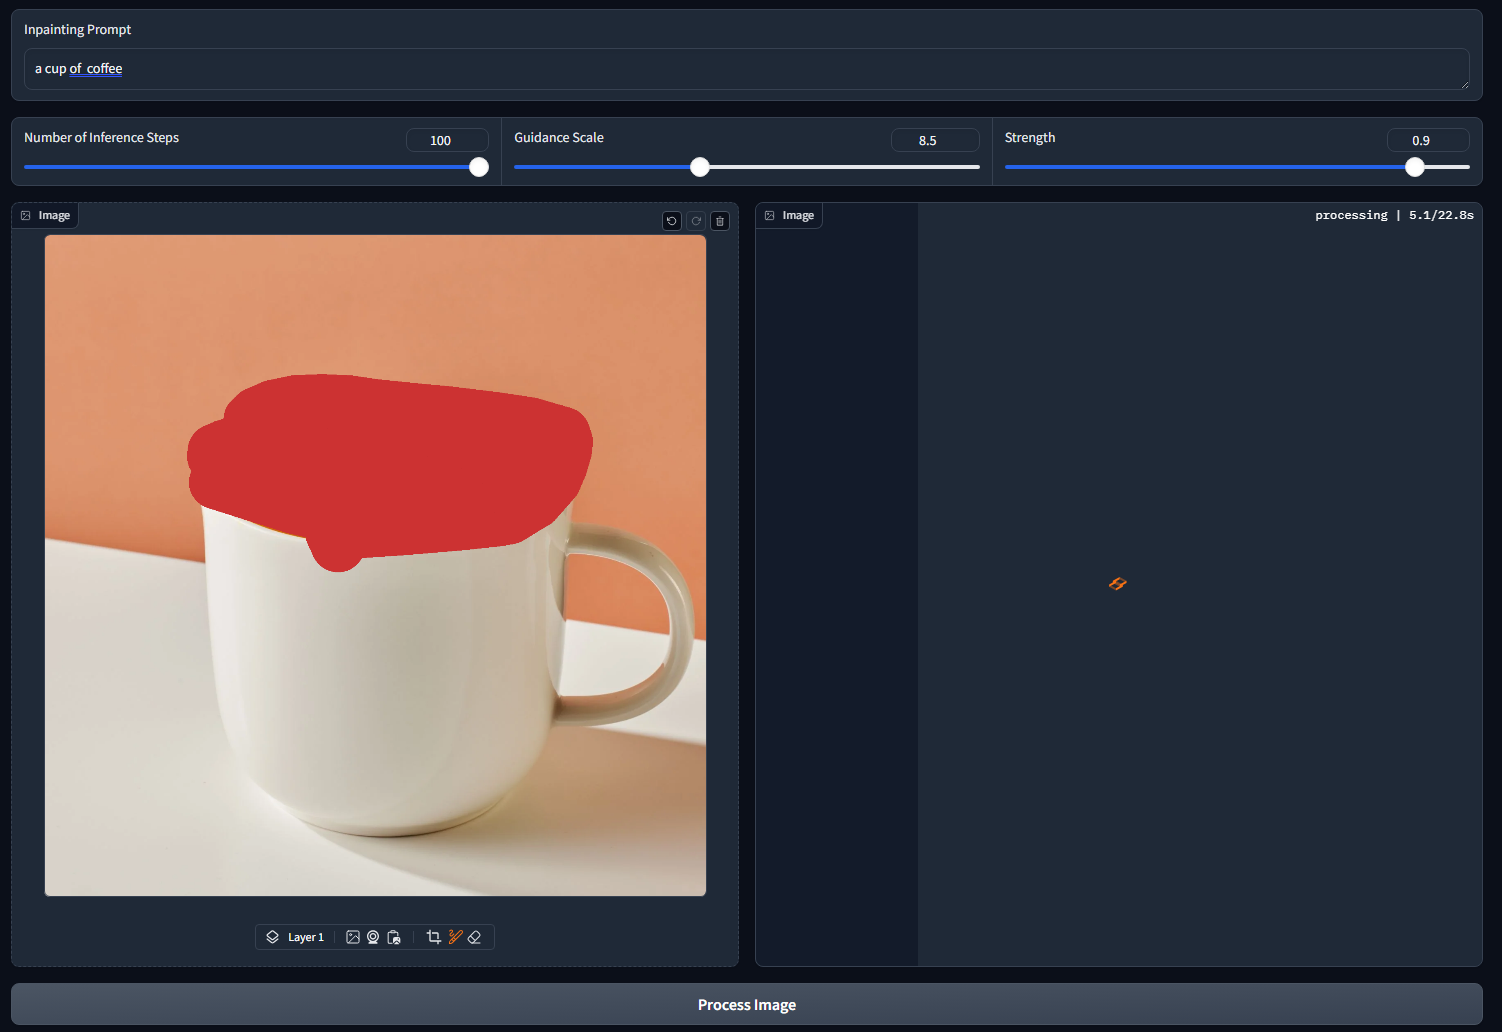
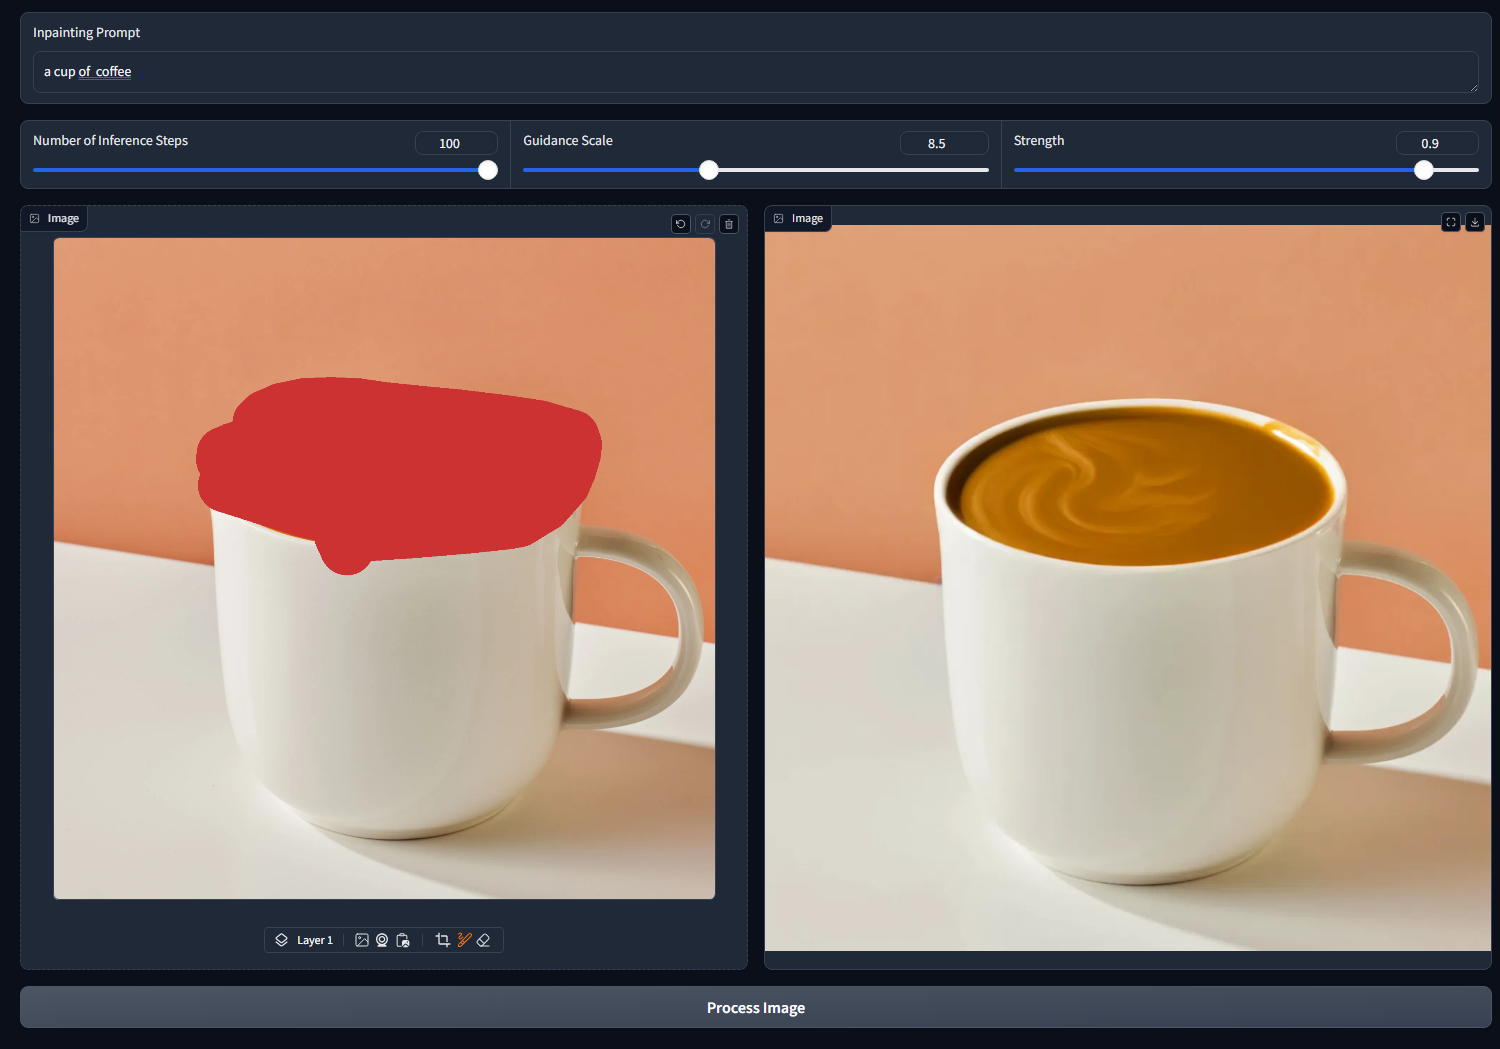
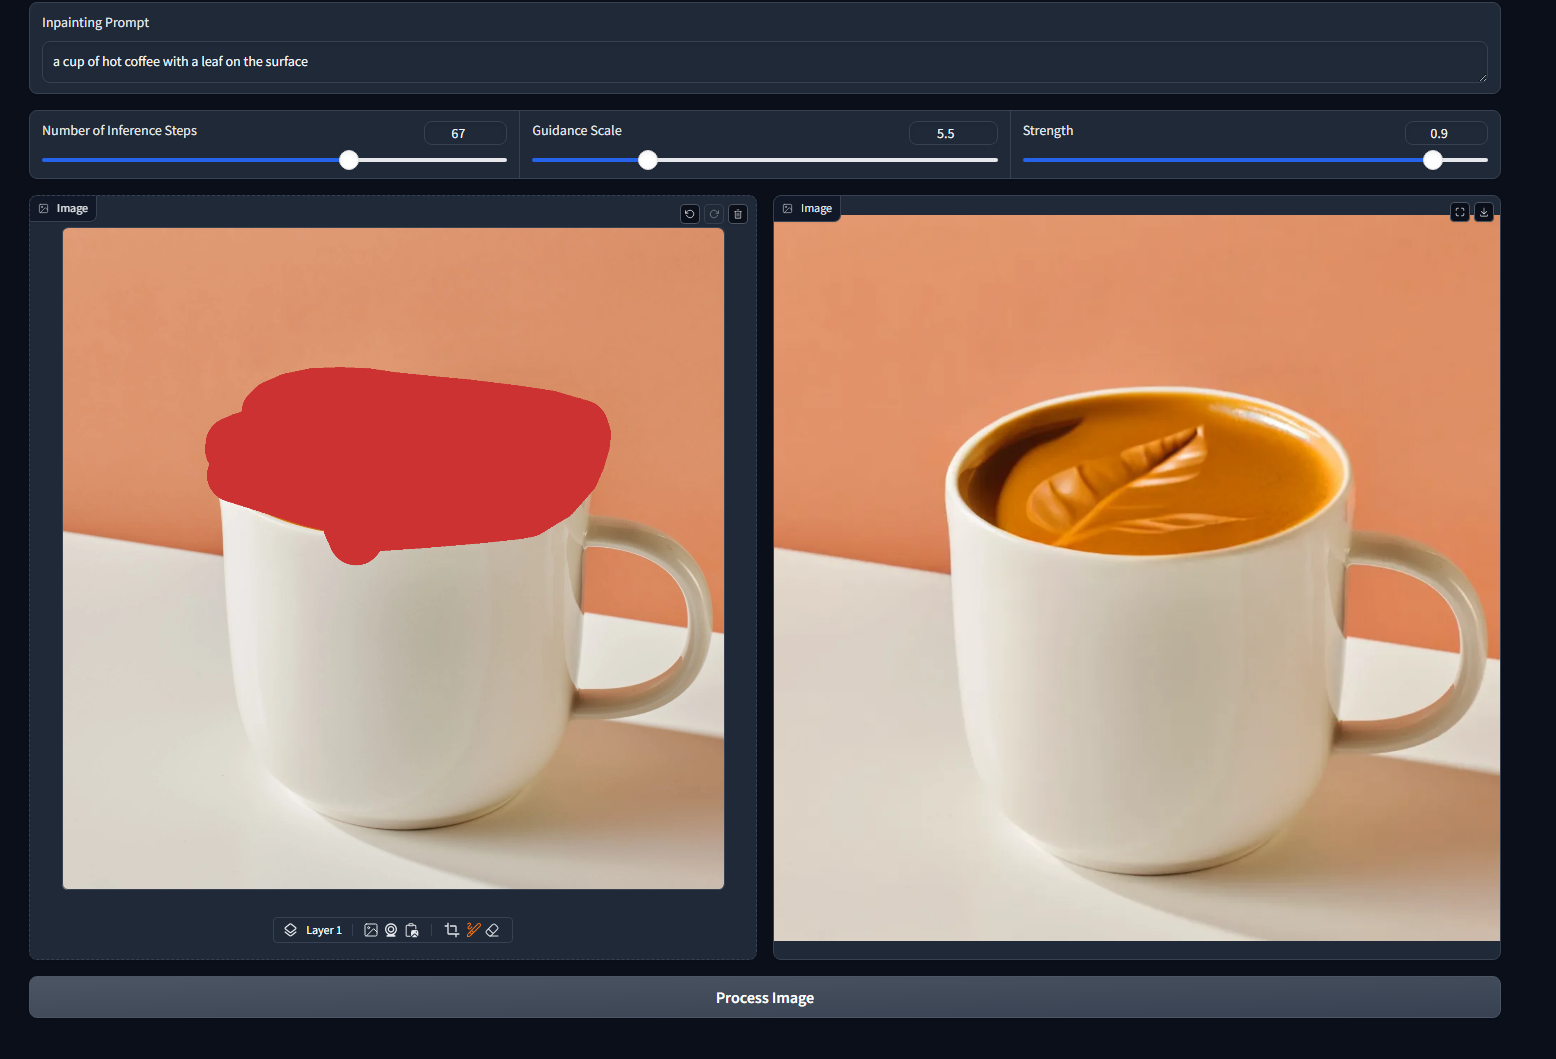
To access the web app, go to: http://127.0.0.1:7860 in the browser. You can see the app interface as shown below:

Conclusion
In this tutorial, we explored how to use impainting with diffusion models to modify specific parts of an image effectively. With libraries like Diffusers and Gradio, we can create interactive applications that make image editing easy and accessible. Feel free to experiment with different prompts and parameters to see how they affect the inpainting results!
References
Hugging Face. (n.d.). Inpainting. In diffusers documentation. Retrieved December 16, 2024, from https://huggingface.co/docs/diffusers/using-diffusers/inpaint